Web Shells Explained | TryHackMe Detecting Web Shells
Introduction
Introduction
In this analysis, I explore the detection and investigation of web shells on web servers. I demonstrate how these malicious scripts can be uploaded through vulnerabilities, such as misconfigured file uploads, to give attackers remote control over a server. Once established, web shells can be used for various malicious activities, including reconnaissance, privilege escalation, lateral movement within the network, and data exfiltration. I also provide the walkthrough and answers for TryHackMe Detecting Web Shells
Practical Web Shell Detection Techniques
I delve into several practical techniques for detecting the presence of web shells:
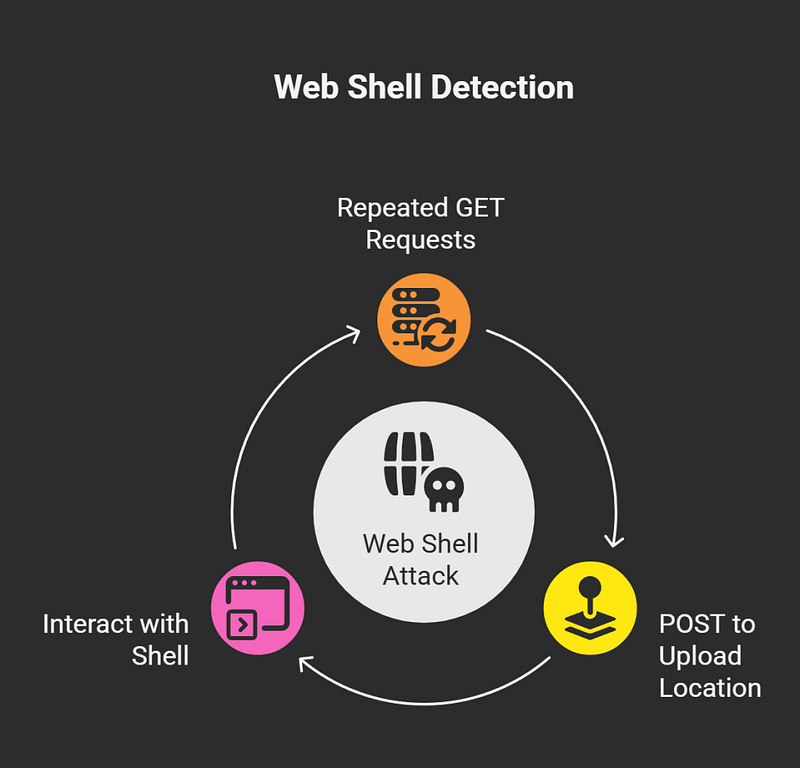
- Repeated GET Requests: Multiple GET requests to the same directory, especially those targeting common upload locations or pages that do not exist, can indicate an attacker’s attempt to find a writable directory to place a web shell.
- POST followed by GET Requests: A common pattern of a successful web shell upload is a POST request to an upload location, immediately followed by repeated GET requests as the attacker begins to interact with the shell.
- Suspicious User-Agents and IP Addresses: Altered or outdated user-agents, blacklisted user-agents (such as ‘curl’), and requests originating from suspicious internal IP addresses are strong indicators of malicious activity.
- Unusual Query Strings: The presence of unusual or encoded query strings, especially those containing commands like ‘cmd’ or ‘exec’, is highly suspicious.
- AuditD Logs: In a Linux environment, the auditd tool can be used to confirm if a file was written to the disk following a suspicious POST request, providing concrete evidence of a web shell upload.
TryHackMe Web Shell Investigation

I provide a practical walkthrough using a TryHackMe room called “Detecting Web Shells” to demonstrate how to investigate a web shell. In this exercise, I show how to:
- Access the web shell and determine the user account under which it is running, which is typically ‘www-data’ for web servers.
- Use basic Linux commands like ls and cat to list directory contents and find a flag.
- Identify the attacker’s IP address (203.0.113.66 in this case) by filtering the Apache access logs for 404 response codes and suspicious user agents.
- Determine the first directory the attacker successfully identified (‘wordpress’).
- Identify the name of the uploaded web shell file (‘upload_form.php’).
- Find the first command the attacker ran (‘whoami’).
- Identify a second file the attacker downloaded (‘linpeas.sh’), a common script for privilege escalation.
- Locate a hidden flag within the web shell by navigating to the /var/www/html/wordpress/wp-content/uploads/ directory and displaying its contents.
Pro Tip: Choose tools that allow syntax highlighting for commands and code snippets.
Commands Used in the Investigation
Throughout the investigation, I use a variety of commands to analyze the system and the web shell’s activity:
- p0wny-shell: A minimalistic, single-file PHP web shell.
- system() and shell_exec(): PHP functions used to execute system commands.
- whoami: Displays the current user.
- ls: Lists directory contents.
- cat: Displays the contents of a file.
- find: Locates files.
- less: Views file contents in a paginated way.
- grep: Filters log entries.
- cd: Changes directories.
- curl: Downloads files.